Sales – Invoices/Offers
Table to Contents
1. Introduction to Sales – Invoices/Offers
2. Finding invoices/offers
3. Invoices/offers preview
4. Changing existing invoice/offer
5. Creating advanced payment invoice (API) from booking
6. Creating final invoice from booking
7. Canceling the invoice
8. Creating invoice from the Invoices/Offers
1. Introduction to Sales – Invoices/Offers
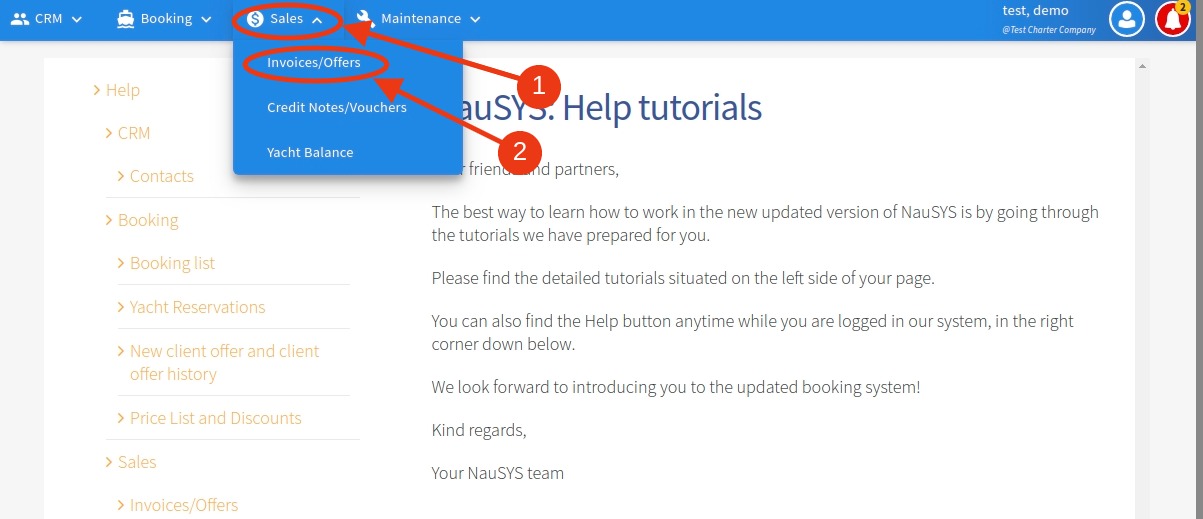
To access your invoices or offers, please select Sales menu (1) and click on the Invoices/Offers (2).
Picture 1.
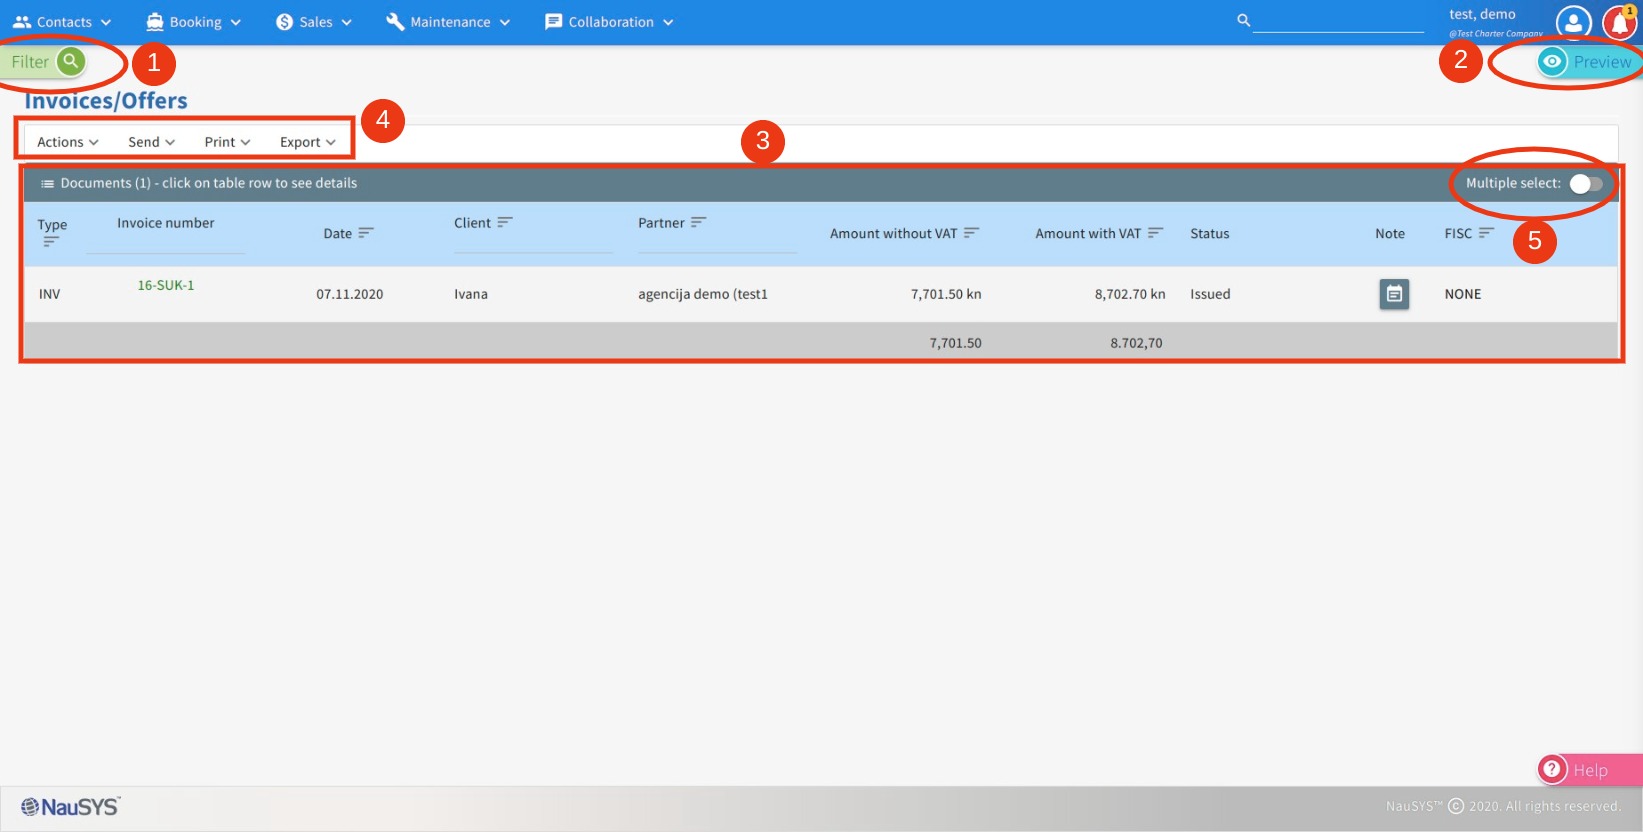
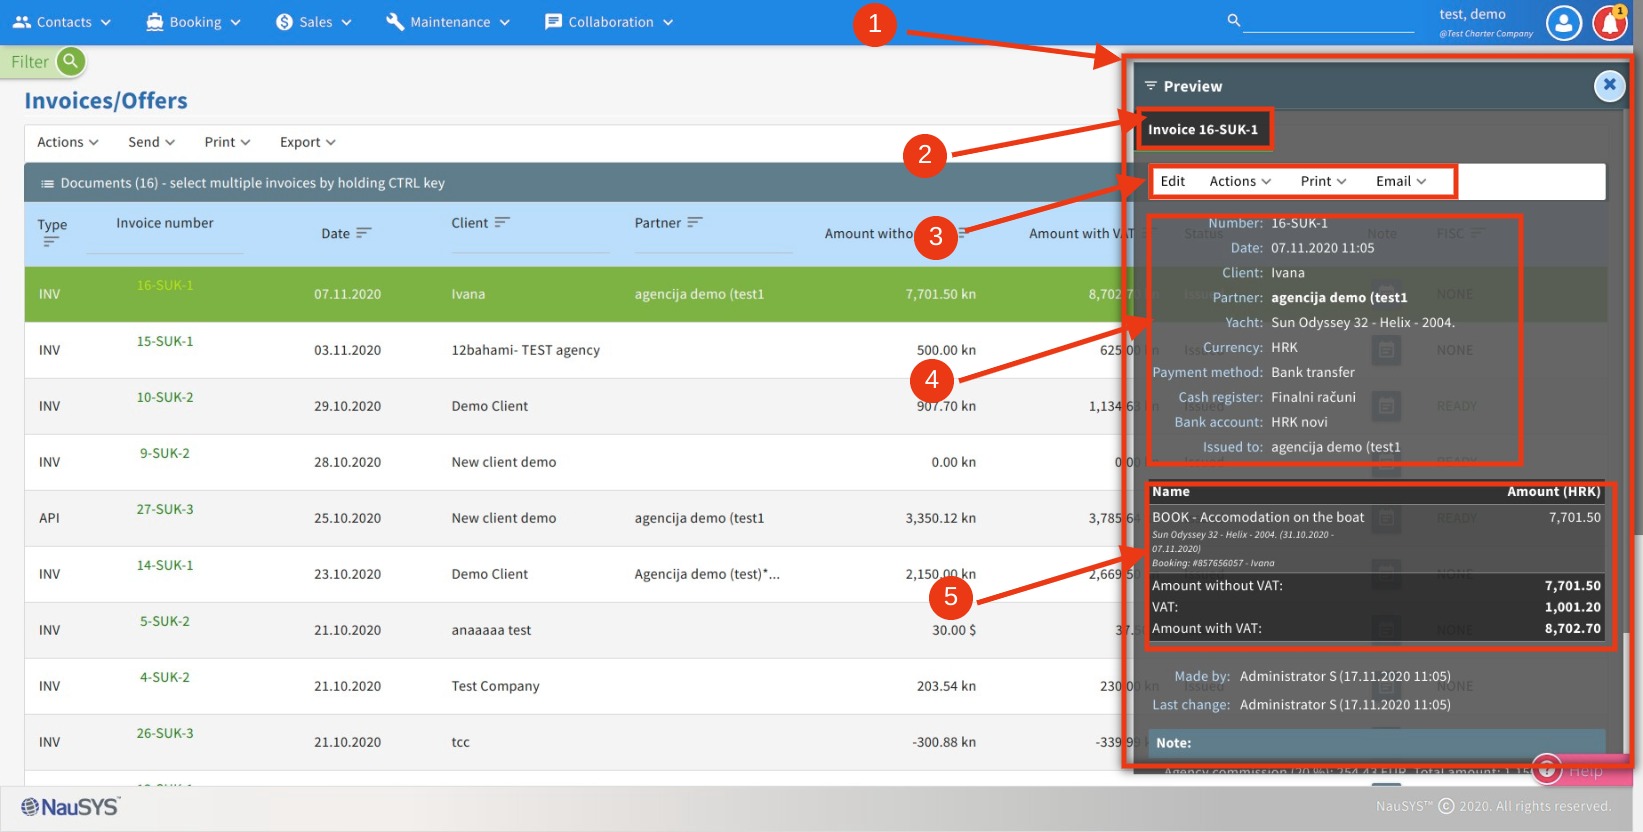
Inside the Invoices/Offers you are presented with the following window as seen in picture 2:
(1) Filter – search for made invoices or offers
(2) Preview – shows more details of the invoice or offer
(3) List of results – displays and sorts results
(4) Menu bar – allows all possible actions with the results
(5) Multiple select – enables/disables selection of more invoices simultaneously
Picture 2.
2. Finding invoices/offers
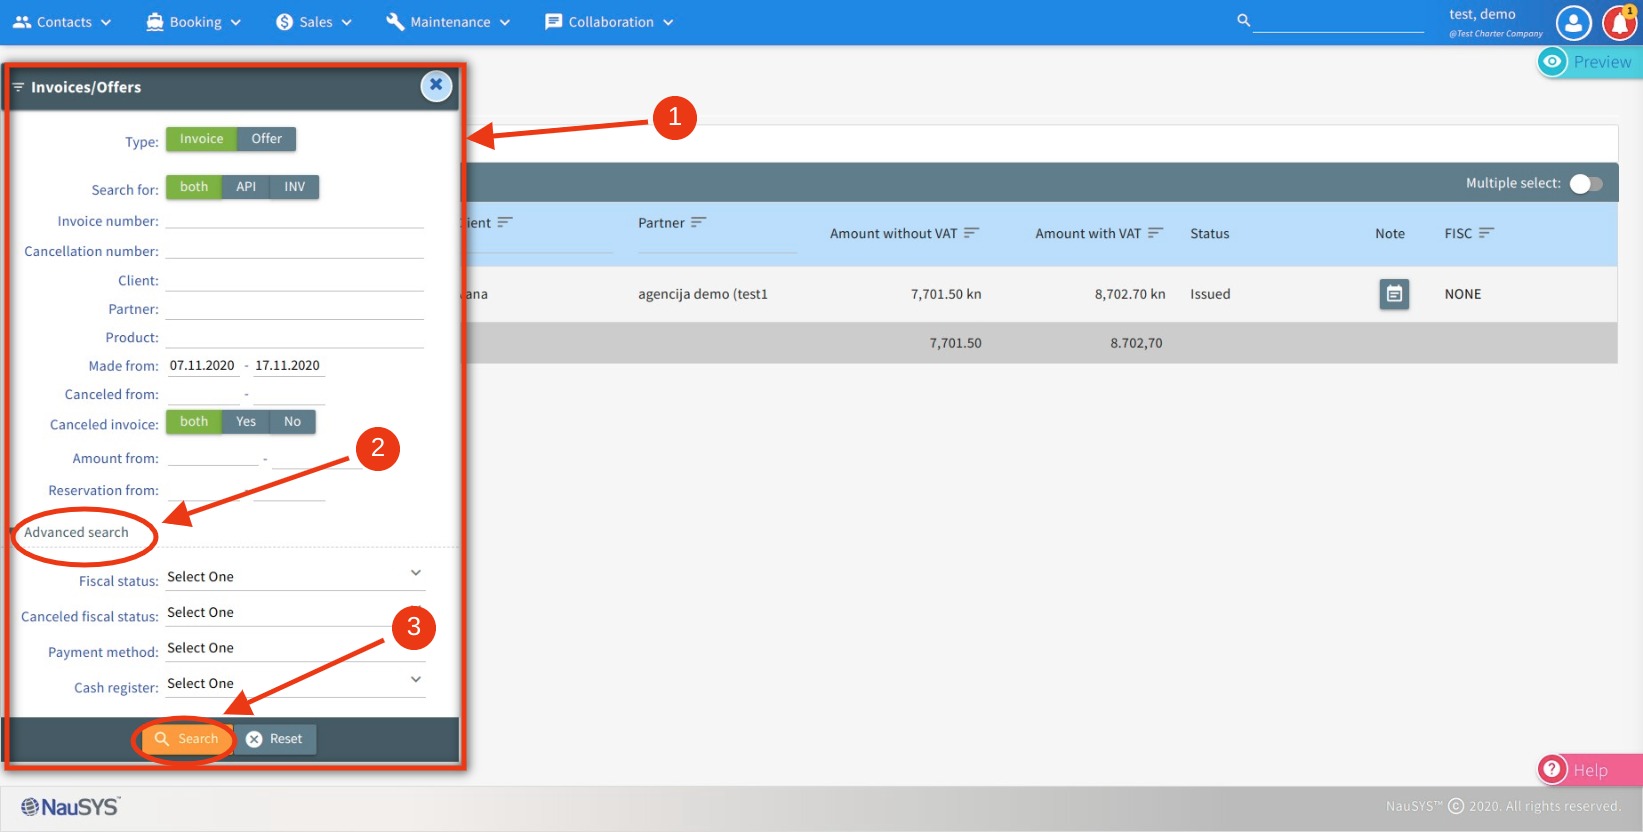
To search for invoices or offers, click on the Filter and choose criteria for your search (1). By opening Advanced search (2) you can use additional criteria to narrow down your search even more.
After you set the criteria, click on the Search button to see the results of your search.
Picture 3.
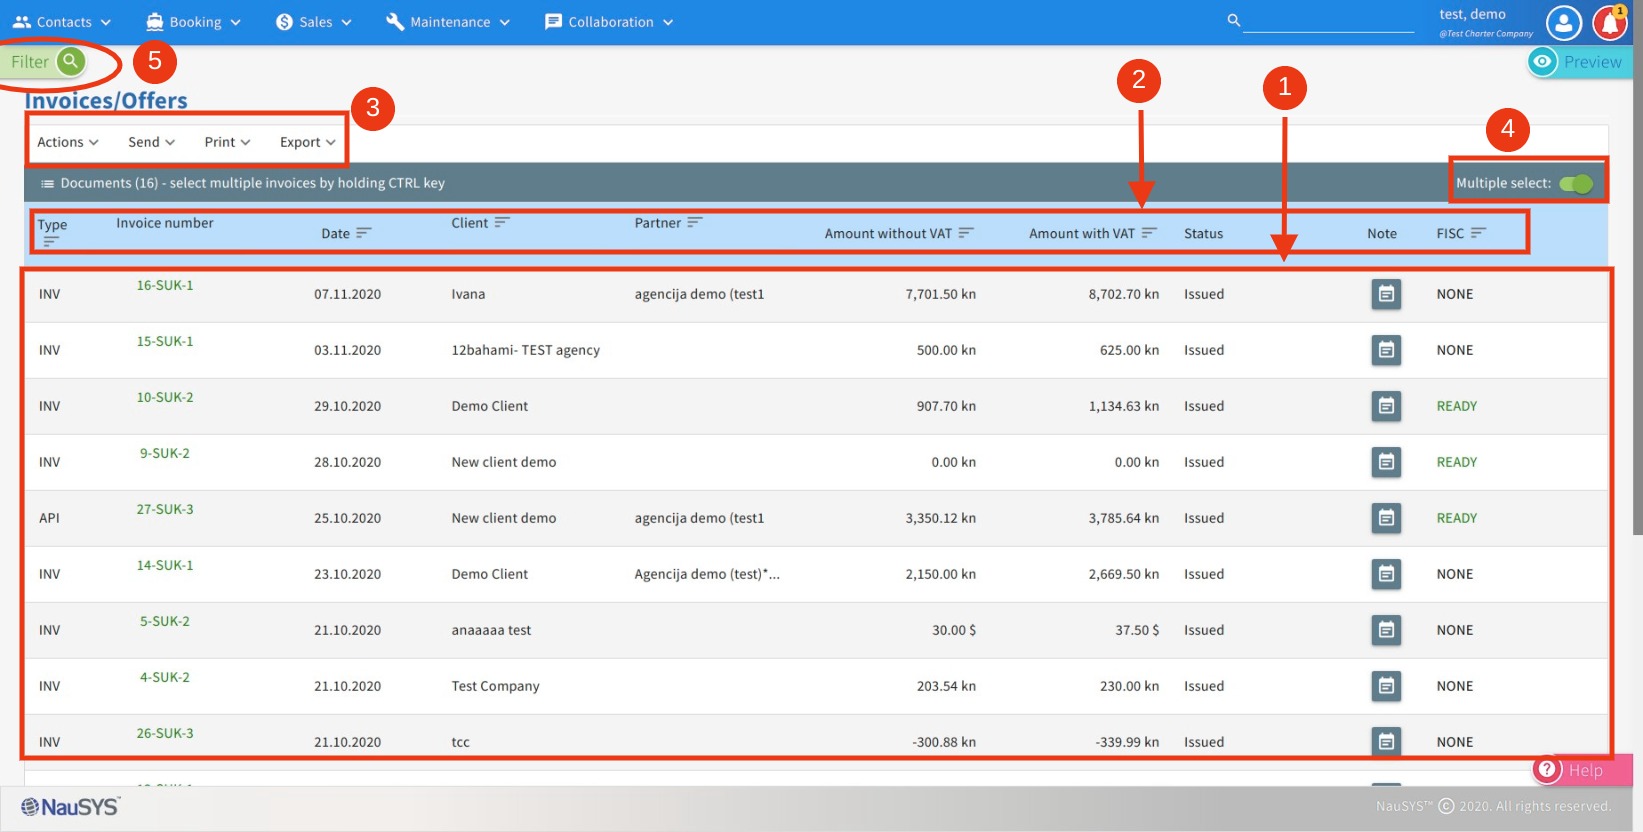
After the results (1) of the search are shown, you can sort (2) them by type, number, date created, client, agency, etc.
Use Menu bar (3) to do various actions with the results or selected invoice.
To select more than one invoice, click on the Multiple select button (4) to enable it. Select invoices by clicking on left mouse button and Ctrl button at the same time.
If you need to make a new search, simply click on the Filter button.
Picture 4.
3. Invoices/offers preview
To check more details of the invoice, simply click on it and the Preview will appear on the right side of the workspace (1).
The Preview includes the following sections:
(2) Invoice number
(3) Menu bar
(4) Invoice details
(5) Item list and amount
(6) Note
(7) Links
Picture 5.

Picture 6.
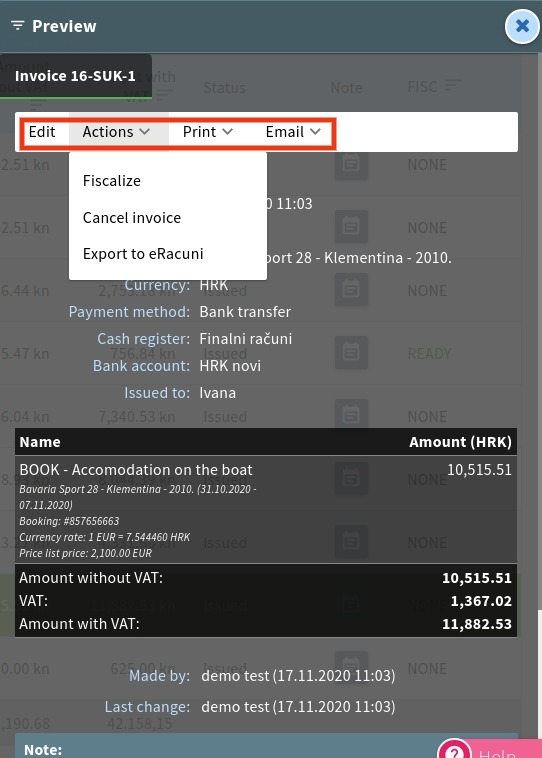
Menu bar on the Preview allows you to edit and do certain actions considering selected invoice, such as fiscalizing or canceling the invoice, printing or sending it via email.
Picture 7.
4. Changing existing invoice/offer
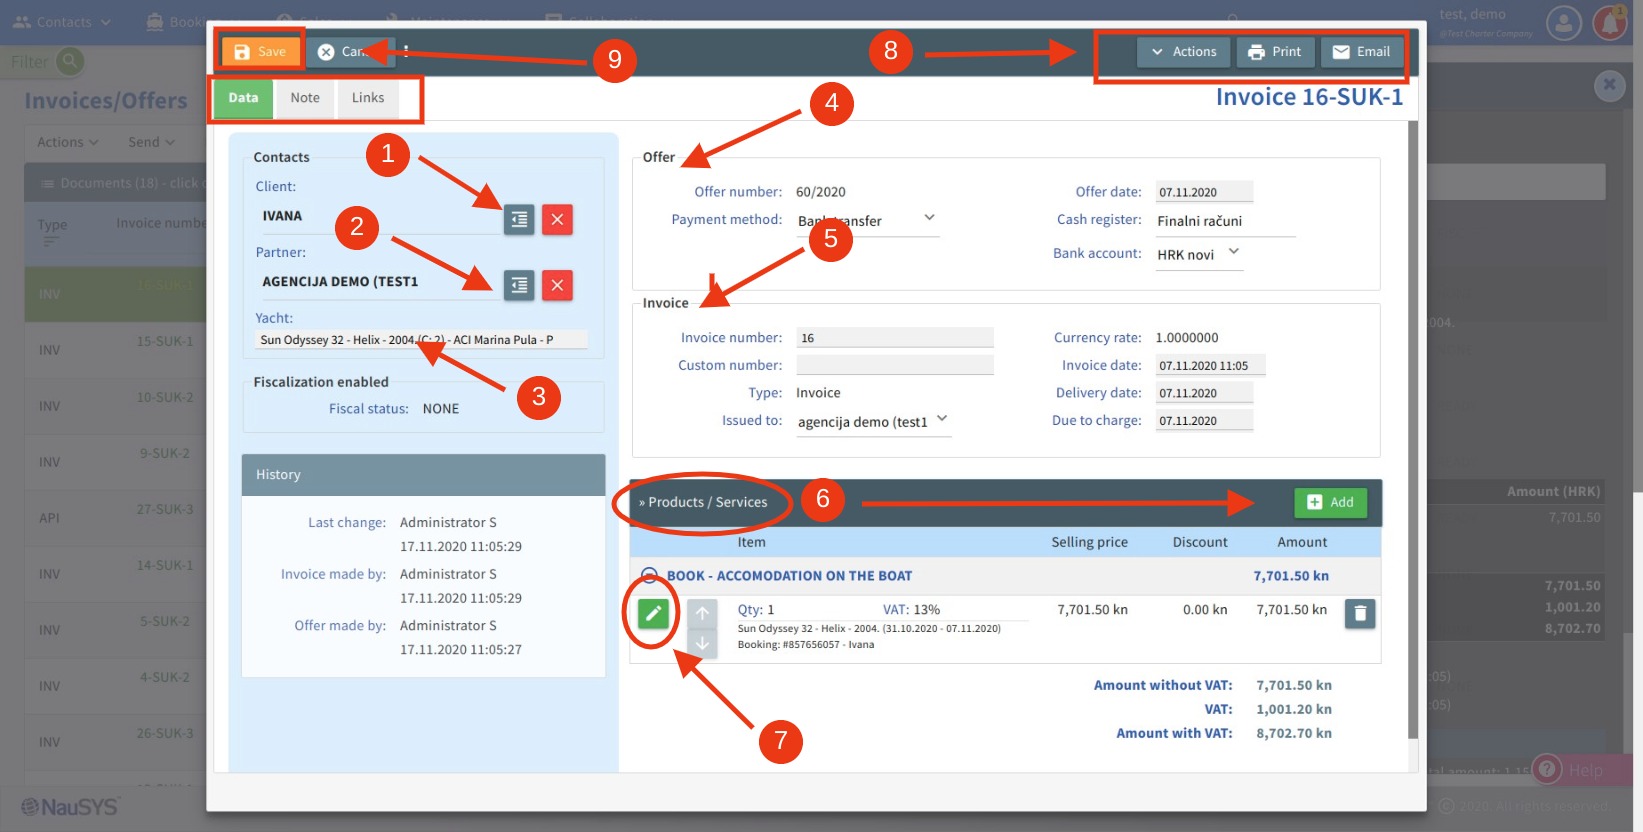
After clicking on the Edit button in the Preview, another window will be displayed in which you can change information regarding the invoice, as seen in picture 8.
Picture 8.
It is possible to change client, agency or yacht details (1, 2, 3). Additional information about the invoice/offer can be also changed (4, 5).
To add other Products/services to the invoice, click on the Add button (6) and choose the needed product.
To edit details about the product click on Edit button (7).
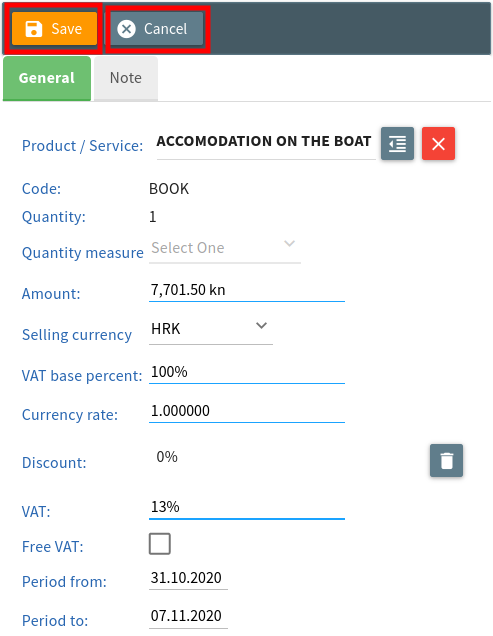
In a new window (picture 9) you can change any existing detail for the product. Click Save button to save made changes or click Cancel to go back to the invoice.
Picture 9.
On the invoice, buttons in the upper right corner (8) allow you to make Actions with the invoice (Fiscalize, Cancel or Export), Print or send invoice via Email.
Please be aware that once the invoice is fiscalized, it cannot be edited or deleted. You can only cancel the fiscalized invoice.
After you are done with changes, click on the Save button (9).
5. Creating advanced payment invoice (API) from booking
To create advanced payment invoice (API) you will first need to fetch the booking from the Booking list or find it through Yacht reservations.
Click on the Edit button inside the booking to begin making changes.

Picture 10.
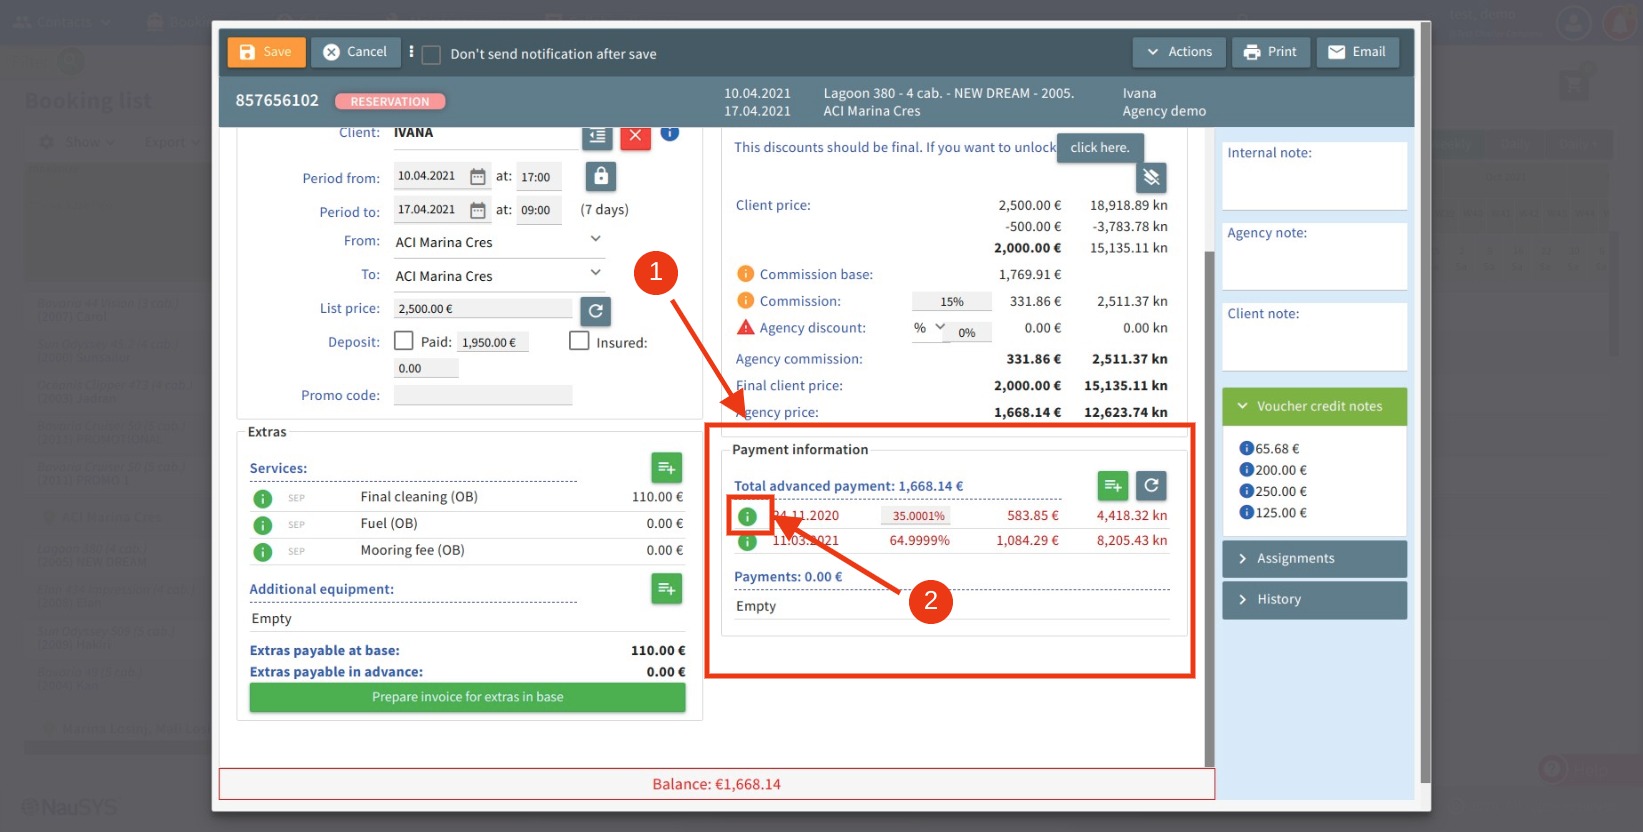
In edit mode, see the Payment Information section (1).
Click on Details button (2) and a new pop-up window will appear.
Picture 11.
Inside the window, proceed to enter the payment plan by clicking on New payment from payment plan button (1). Additionally, from this pop-up window you choose to Edit (2) or Delete (3) the payment plan.

Picture 12.
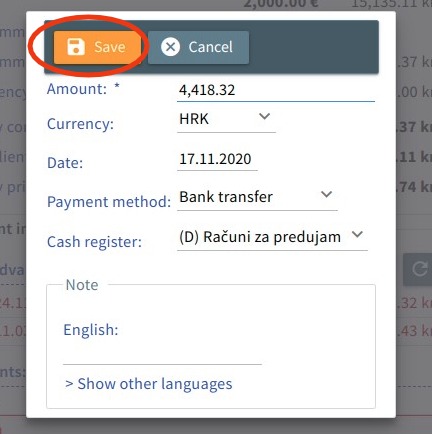
After you click on New payment from the payment plan button, a new window will be displayed in which you can set the payment information. After you are done, click on the Save button to save the payment and go back to the booking. Click again on the Save button to save made changes in the booking.
Picture 13.
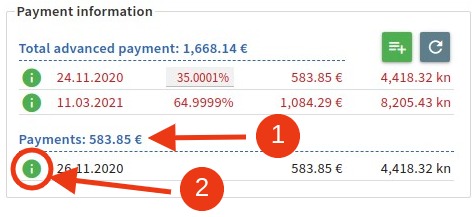
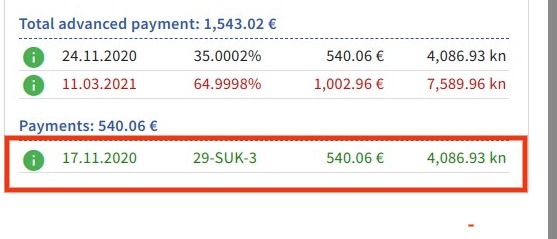
After saving, the payment will be displayed in the Payment information section under Payments (1).
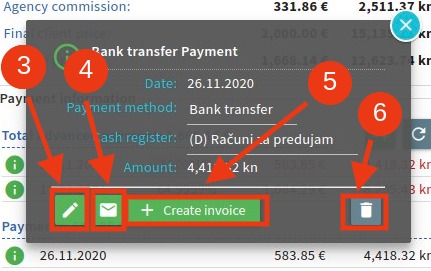
If you click on Details button (2), you can choose to Edit (3) the payment, Send (4) confirmation via email, Create invoice (API) (5) or Delete (6) the payment.
Picture 14.
Picture 15.
Click on the Create invoice to make advanced payment invoice (API).
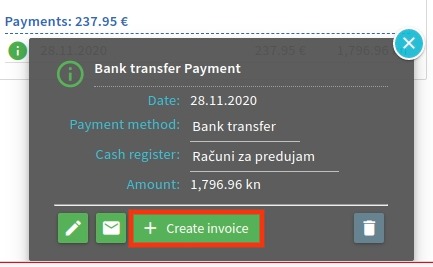
Picture 16.
A new window will appear from which you can edit the API by clicking on the Edit button.
To go back to the booking, click on the Back button.

Picture 17.
The advanced payment invoice is now created and will be displayed under Payment information section.
Once created, the invoice will be also displayed under Links tab in the booking.
Picture 18.
6. Creating final invoice from booking
To create final invoice, fetch the booking from the Booking list or find it through Yacht reservations.
In the booking, click on the button Create final invoice.
You can also create invoice by clicking Actions button inside the booking or in the Preview.
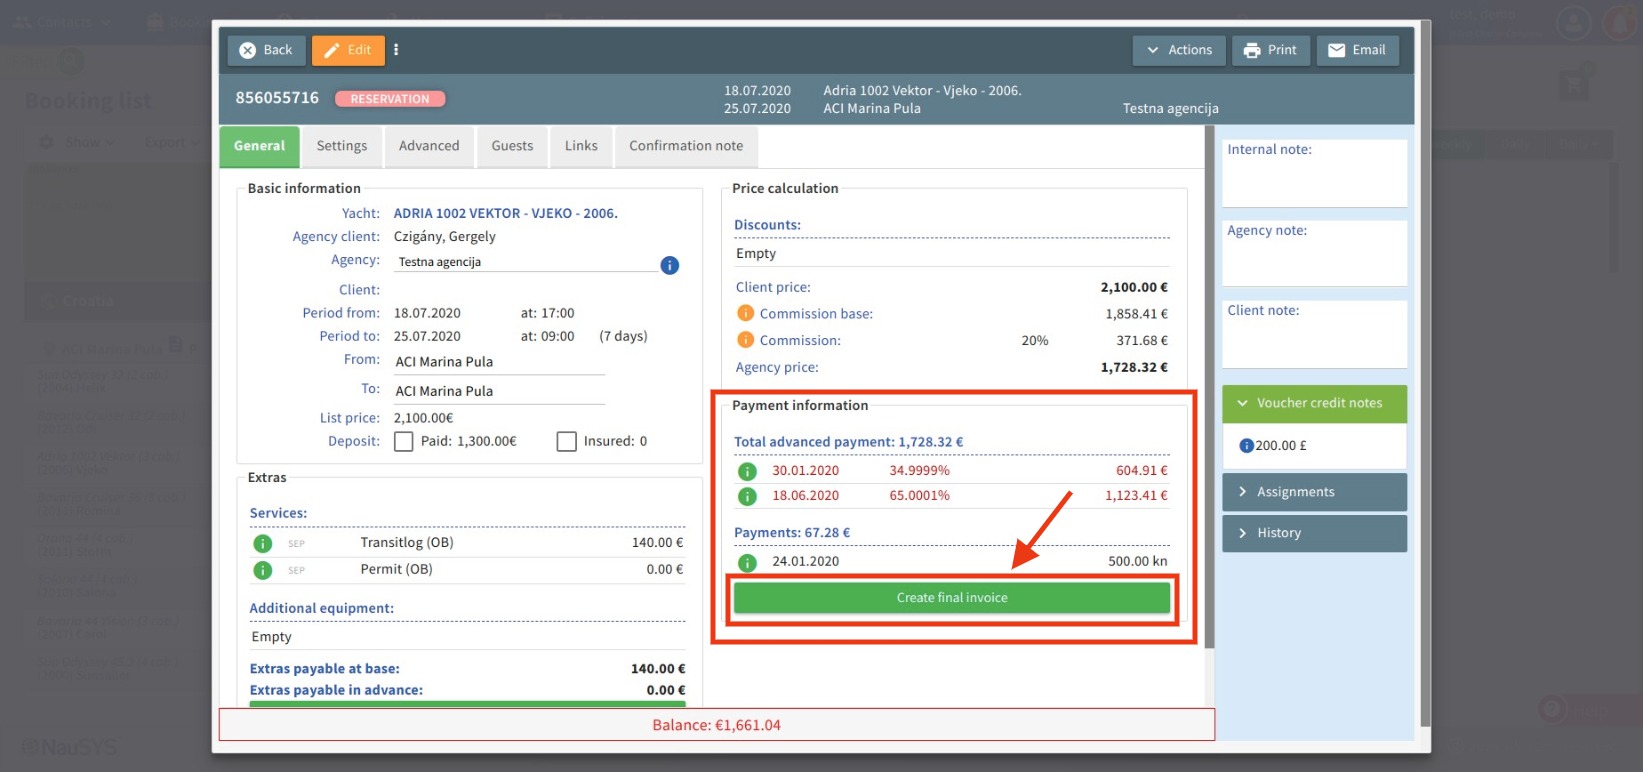
Picture 19.
The final invoice is now created and a new window will open looking as picture 20.
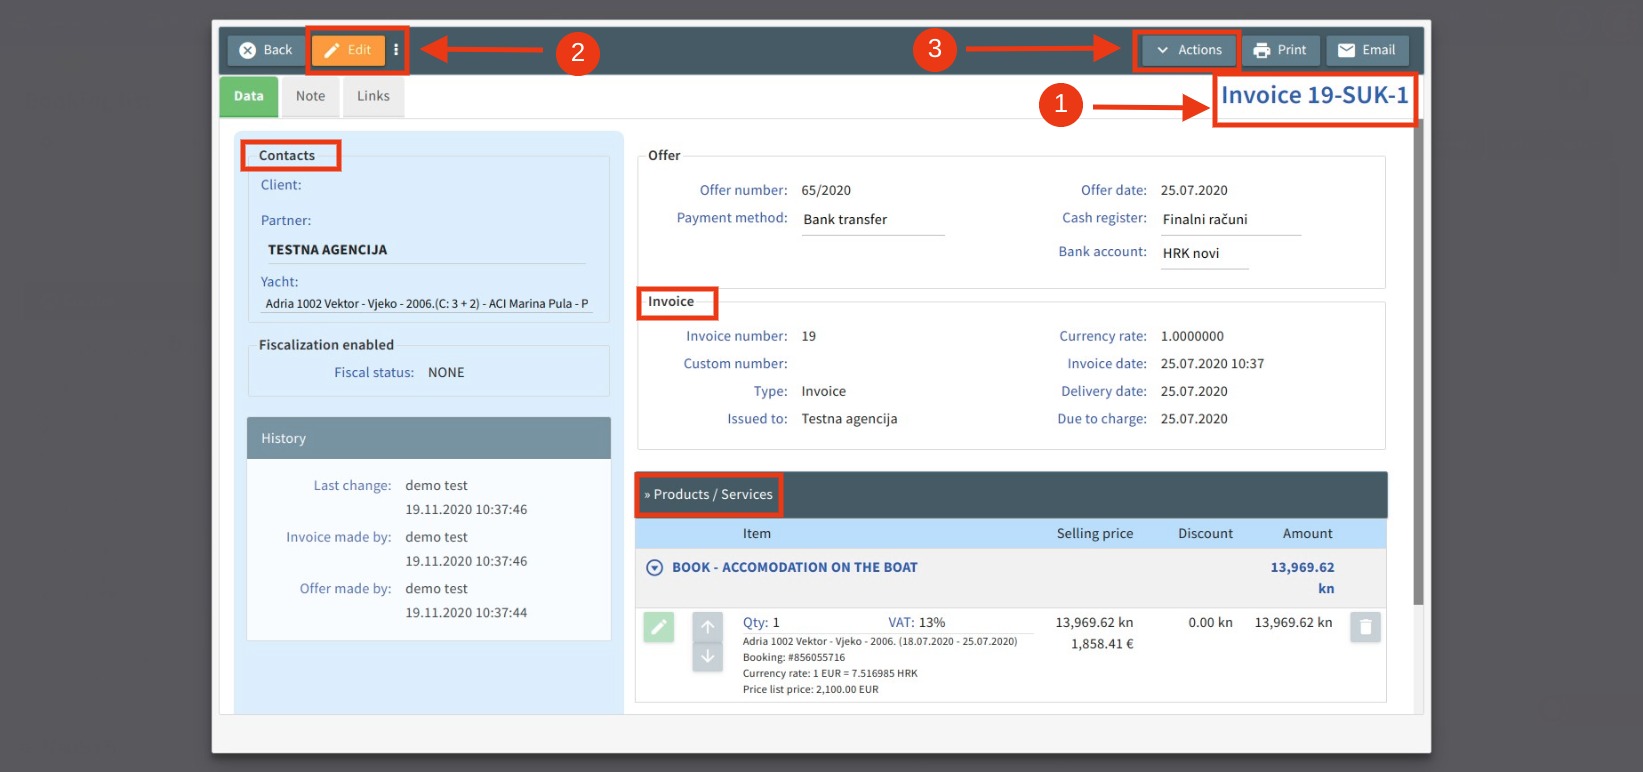
Picture 20.
Invoice number (1) will be displayed in the right corner. If you need to edit the invoice, click on the Edit button (2). Actions button (3) allows you to Fiscalize, Cancel or Export the invoice.
By clicking on the Back button, you will go back to the booking.
7. Canceling the invoice
If you made a mistake on the invoice, like wrong date or amount, you can always cancel that invoice.
You can find the invoice using the Filter in the Sales – Invoices/Offers module.
After you find the invoice, click on it to open the Preview. On the menu bar choose Actions button, click Cancel invoice and confirm to make the change.
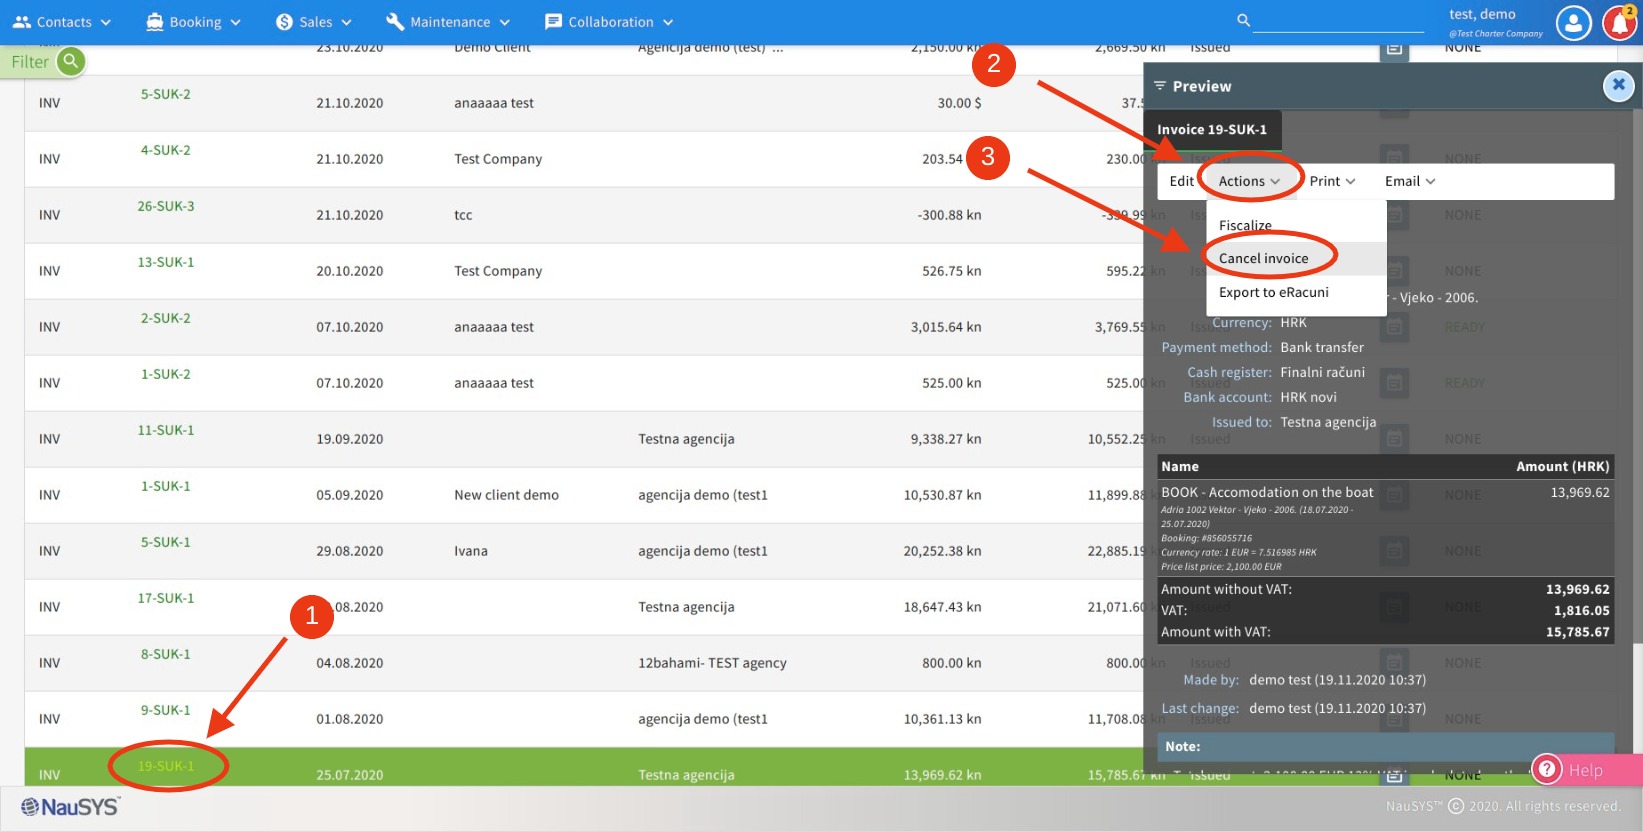
Picture 21.
The invoice is now canceled.
In the list of invoices you can now find the canceled invoice and see more details of the cancellation in the Preview.
You can also access the invoice by fetching booking from the Booking list. Click on the Print invoice and in the new window use Actions button to Cancel invoice.
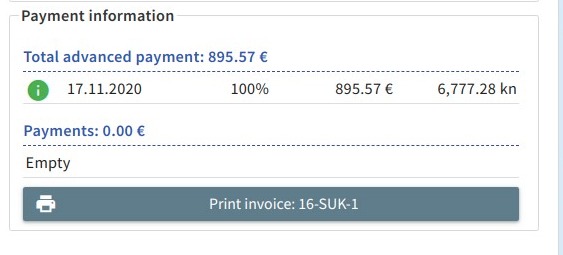
Picture 22.
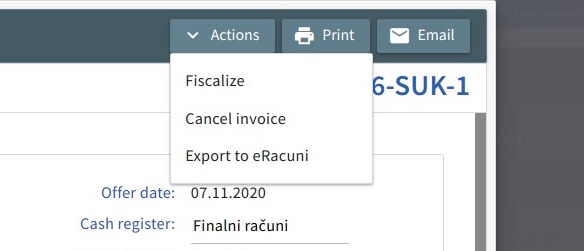
Picture 23.
8. Creating invoice from the Invoices/offers
In order to create a new invoice/offer (for example: for materials, warehouse, etc.), in the Invoices workspace, use the menu bar and Actions button (1) and click Add new (2).
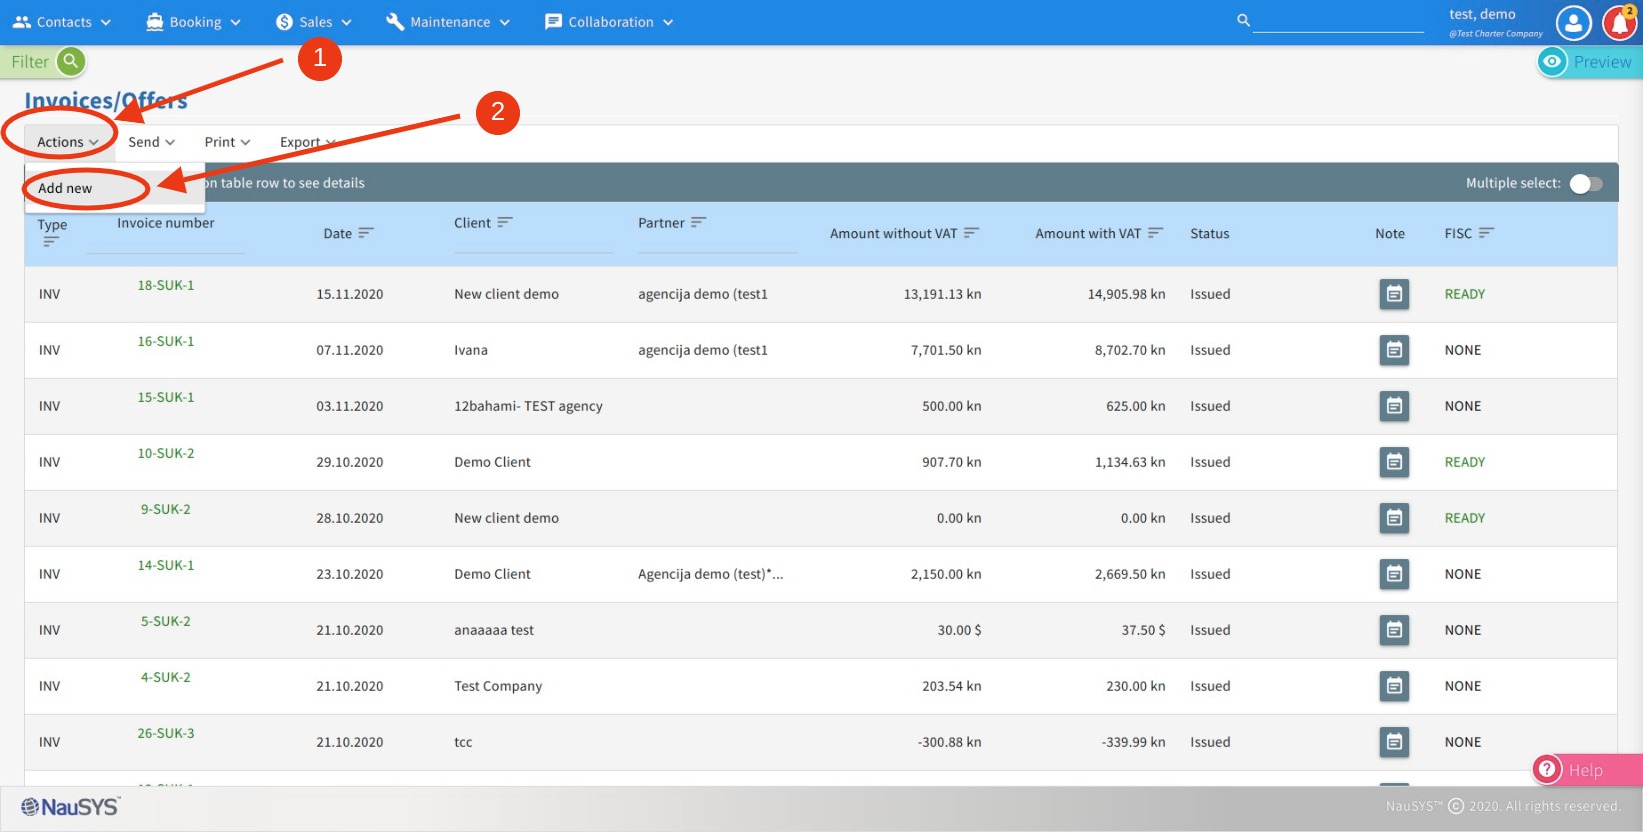
Picture 24.
Inside a new window you can set the information for the invoice/offer.
Please remember to choose the right Cash register (1), Client or Partner (2) and add Products/services (3).
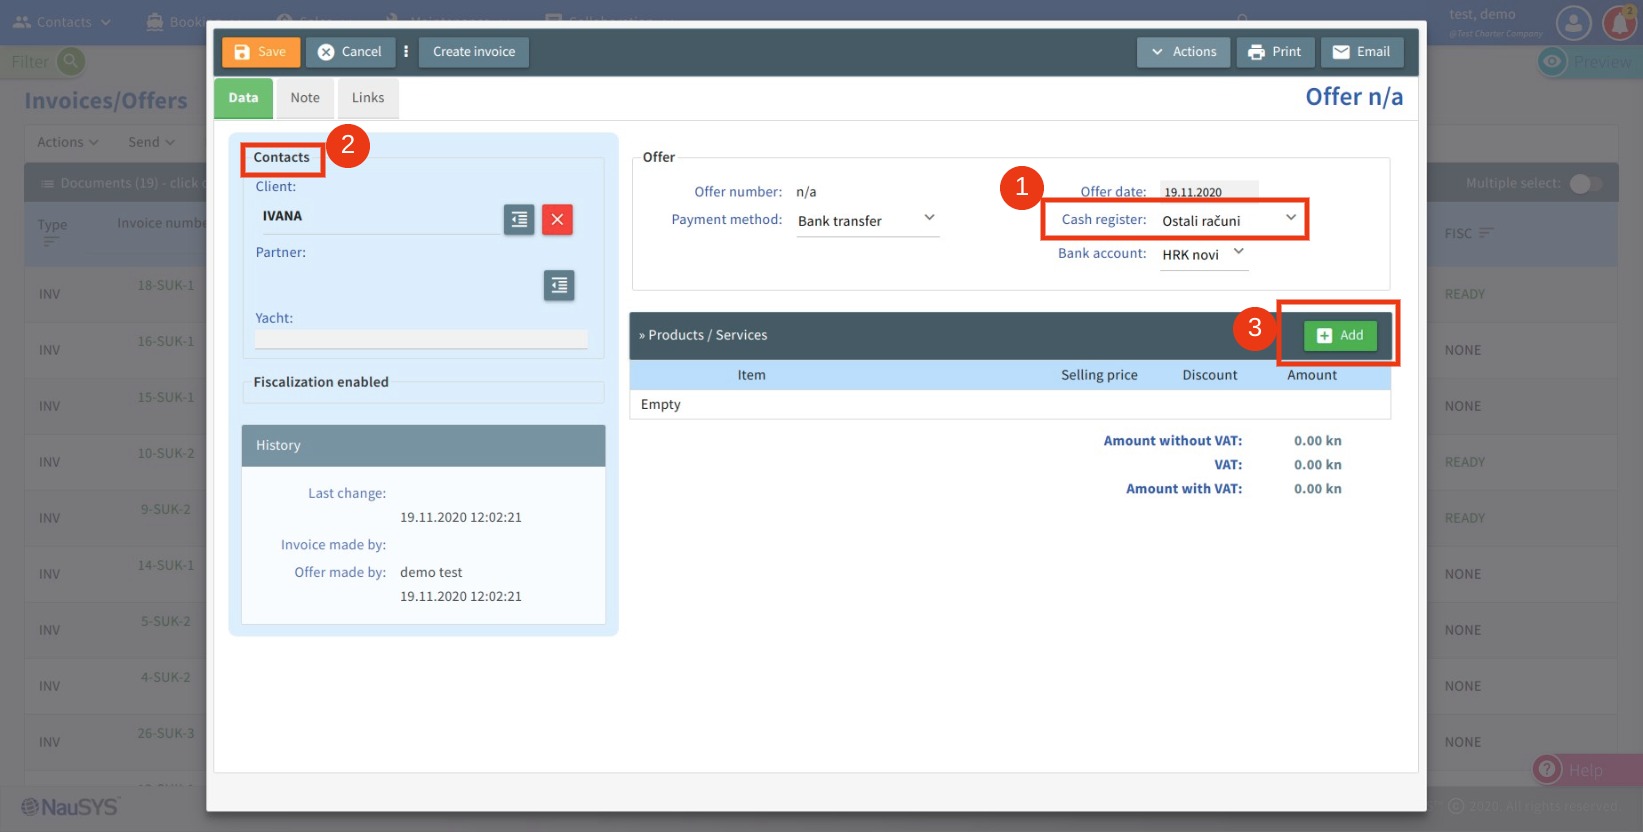
Picture 25.
To add new product/service click on the Add button.
In a new window (picture 26) select the product/service you are charging by clicking on the Fetch (1) button.
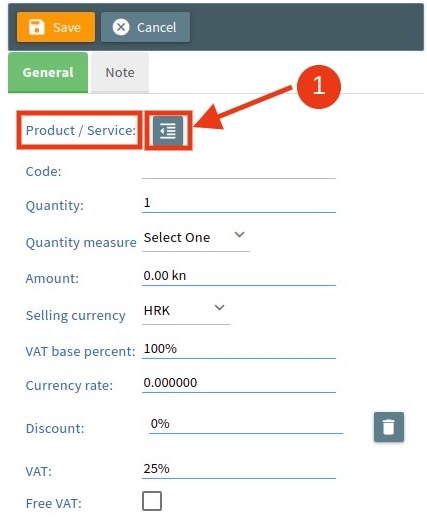
Picture 26.
Another window (picture 27) will display in which you can search for the needed product/service. In the Name (1) text box simply start typing the name of the product and click Search (2). In the results list, choose the desired product by clicking on the Fetch (3) button.
To reset the search click on Reset (4) button. To discard all progress and go back to previous step, click on the Discard (5) button.
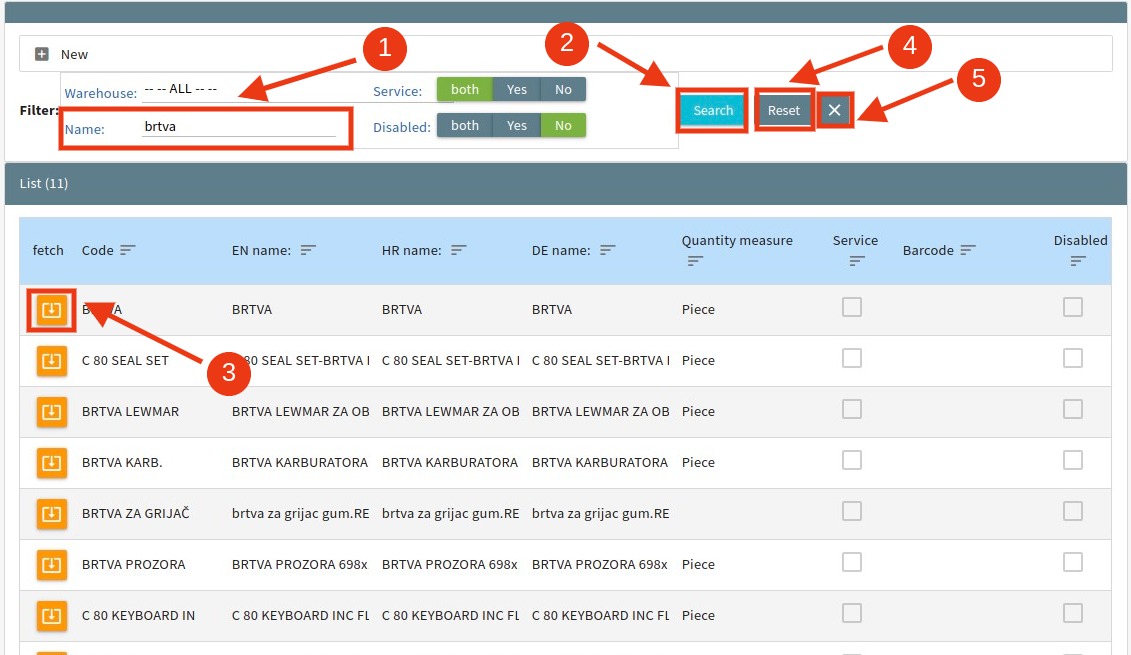
Picture 27.
Click on the Save button to resume creating invoice/offer (picture 27).
After you are done, a new button will appear in the upper left corner. If you want to create invoice with the entered information, click on the button Create invoice.

Picture 28.
Another window will appear allowing you to choose invoice Type, Payment method and Cash register. Click Create invoice and confirm the change.
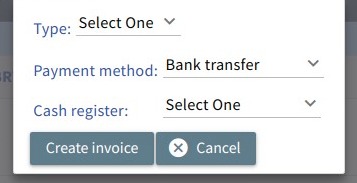
Picture 29.
Your invoice is now created.