CRM – Contacts
Table of Content
1. Introduction to CRM (Customer Relationship Management)
2. Finding contacts
3. Creating new contacts
4. Changing existing contacts
5. Contact preview
1.Introduction to CRM (Customer Relationship Management)
The CRM module allows you to manage your contacts and utilize the data for your marketing promotions and sales.
To access your contacts, please select CRM in the upper left corner of the menu bar (1). Click on the Contacts to open it (2).

Picture 1.
On the the Contacts workspace you are introduced to:
(1) Filter – finds contact
(2) Preview – shows contact details
(3) Menu bar – allows actions
(4) Contacts list – displays and sorts contacts

Picture 2.
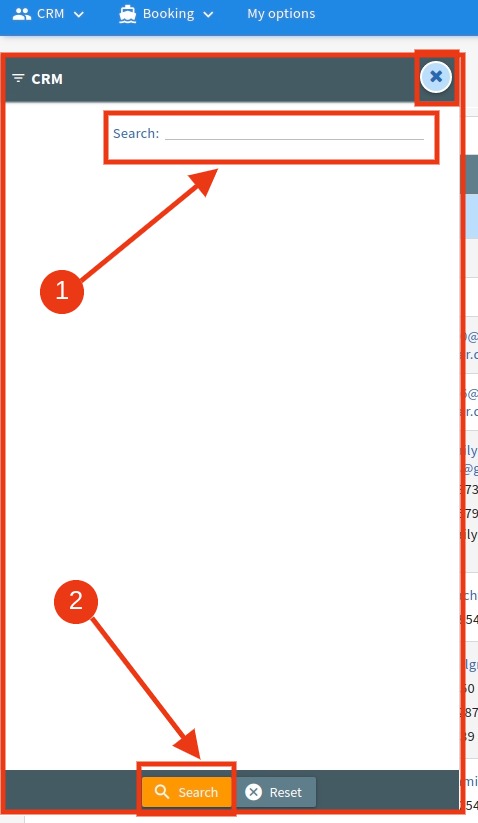
2. Finding contacts
To find a contact, click on Filter. Use the Search text field (1) to write anything associated with the contact you are looking for (name, address, etc.).
Click on the Search button (2) and the results will be displayed on Contacts workspace.
If you do not need to use Filter, you can remove it by clicking on “x” button.
Picture 3.
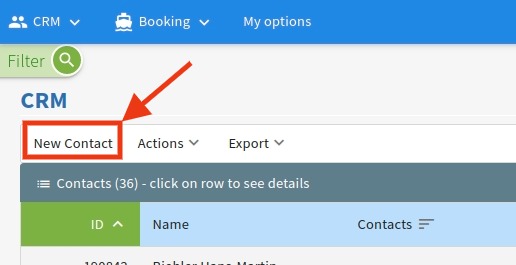
3. Creating new contacts
To create a new contact, please click on the New contact button in the Contacts workspace.
Picture 4.
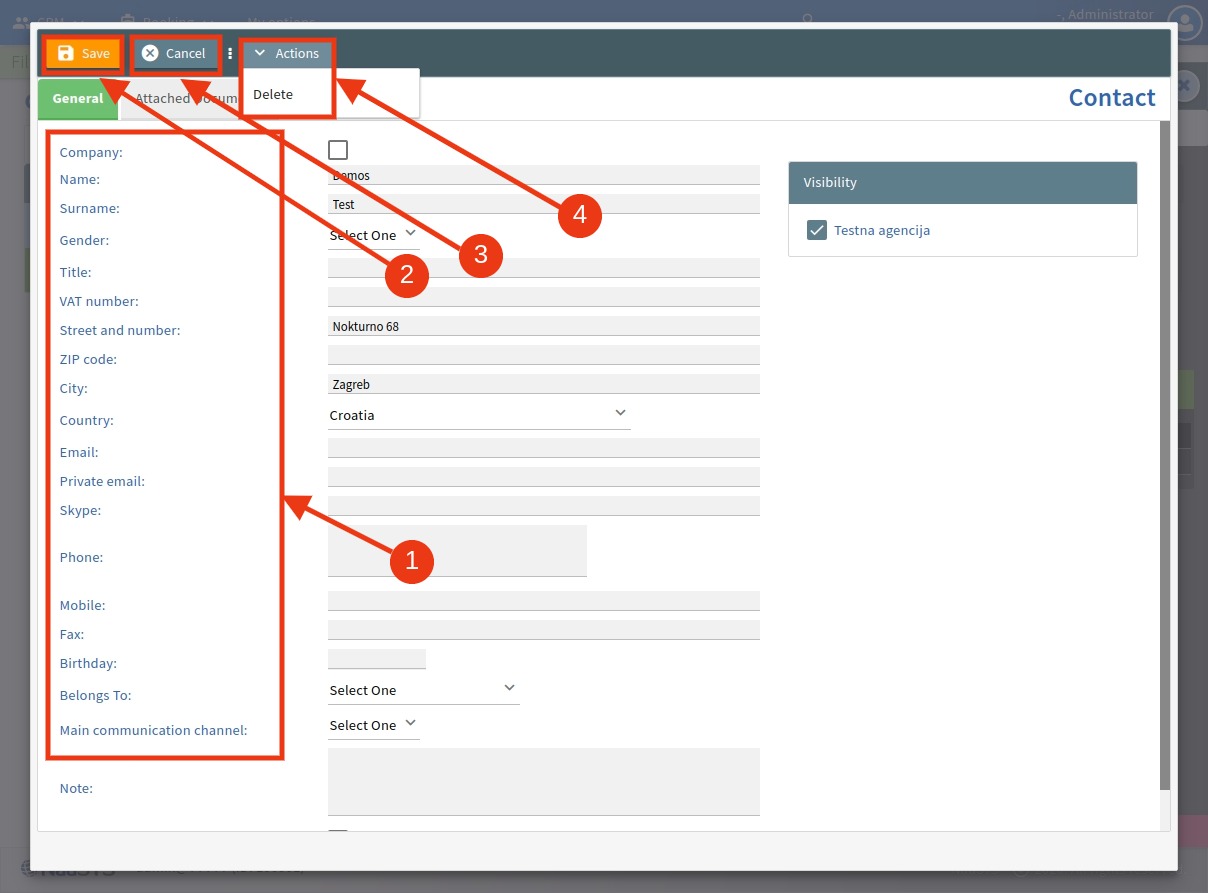
A new window will appear in which you can fill all the information (1) you have.
Once you are done, click on the Save button (2).
To discard progress and go back to the Contacts workspace, click on the Cancel button (3).
If you need to delete a contact, click on the Actions button and choose Delete (4).
Picture 5.
4. Changing existing contact
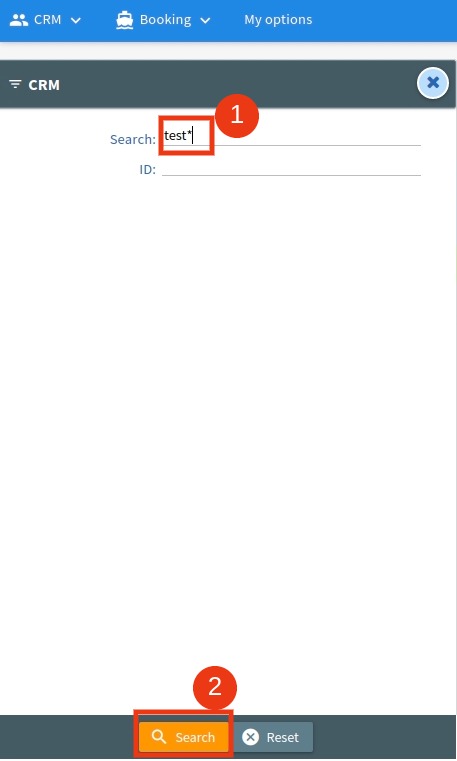
To change existing contact details, find the contact using the Filter.

Picture 6.
Fill in the information (1) and start your search by clicking the Search button (2).
Picture 7.
Select the contact (1) you want to change and on the Preview click Edit (2).
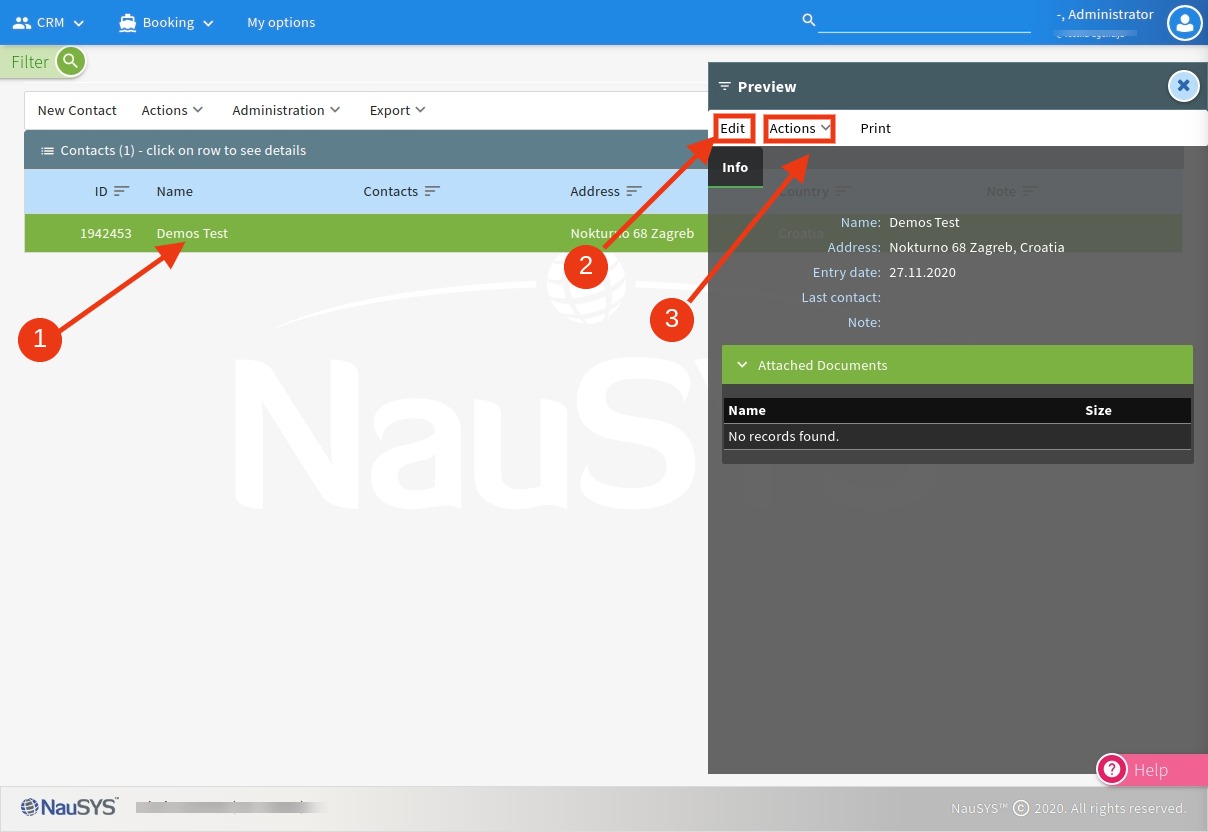
Picture 8.
Inside a new window you can change existing data. Once you are finished, please remember to click Save button.

Picture 9.
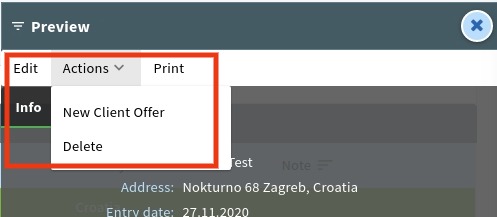
Additionally, in the Preview (picture 9) you can also use Actions to Delete (3) selected contact.
5. Contact preview
To see more details of a contact, click on the desired contact and the Preview will appear on the right side of your workspace.
The Info tab shows you the basic details of the contact and all attached documents regarding this contact, like skipper license, etc.
To exit the Preview click on the “x” button in the right corner.

Picture 10.
The menu bar allows you to Edit this contact, Print details and use Actions to directly Create new client offer or Delete selected contact.
Picture 11.